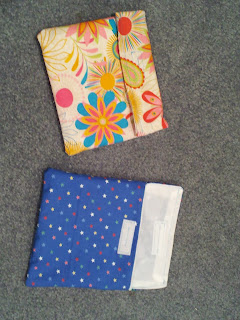
I have been looking for the time to make these and searching
for the right tutorial. I had a way in mind that I wanted to make reusable
snack bags… but alas I did not find a tutorial that made sense to me or that
made the bags quite the way I wanted. So here is another tutorial to add to the
Internet.
 While making these I have hopes of saving some bags from
landfills. And also saving money on all those bags that inevitably get tossed
into the garbage. Did you know that recycling centers will not take ziplocks?
What?!
While making these I have hopes of saving some bags from
landfills. And also saving money on all those bags that inevitably get tossed
into the garbage. Did you know that recycling centers will not take ziplocks?
What?!The first one I made was ok, but I figured it out and made the others look Good. After the first couple, the others took about 10 minutes each. Really fast.
To make the bags I used a cotton outside with a washable
nylon lining and a 2 inch Velcro strip.
First thing was to measure the ziplock bags in order to sew
them to the same size.
Sandwich bags are 7 x 8 inches so I cut pieces to 8 x 10
inches to accommodate a Velcro closure.
Snack bags are 5 x 8 inches so I cut pieces to 8 x 8 inches
to accommodate the Velcro closure. Note: all the pictures that I took are of the sandwich bag size the snack bags are half the size.
I first sewed the inside lining. The seam will be on the outside when you sew them together.
Then I sewed the cotton outer fabric inside out so the seam is sandwiched inside (get it?).
Putting the pieces together I started with the shorter side. It looks a little confusing, but since I wanted both seams hidden, I actually had to (initially) put the pieces together and fold the edges down then hold them together to figure out the position needed to sew. But it isn't difficult and very worth it!
Then the large side, which will be the closure. I sewed the sides first.
I used a pin to keep the pieces together before finishing it off.
Last is velcro. Sew the top and bottom pieces.
Ta Da!
I made a few other fabric options as well. Like super hero and space ones for my son. I am actually thinking of making a bunch more for gifts or even to sell on etsy. I just need more hours in the day!
Overall, I am very pleased with these bags. To wash them I turn them inside out and stick them in a lingerie bag so the Velcro doesn't stick to my clothes or towels. Easy as can be!


Hi Stephanie! What a great tutorial! I love this idea! Thanks for sharing! Blessings from Bama!
ReplyDelete