background & pinterest, facebook script

Showing posts with label Health. Show all posts

Wednesday, July 31, 2013

Feeling Pickled!

When life (or Mom) gives you a bunch of cucumbers and dill... you make pickles!
I have an issue with canned pickles. I don't like them. But I love the fresh deli pickles... and my husband could eat them all day long.

On to my next experiment in the world of fermentation. I spent some time searching the web for the perfect pickling recipe and the issue I had was that they all had relatively the same ingredients but different ways to put them together. Odd. Why would I heat up the salt and water? I didn't have to do that for any other fermenting. When it came down to it, I figured it was my experiment, I was going to do it My way (with help from several websites to figure out ingredient amounts).

Ingredients: Per jar
couple Peppercorn
1/2 tsp Ground mustard (can use more whole mustard seeds, but I used what I had)
1 tablespoon Sea Salt
bunch of Dill leaves and flowers
1 tsp Apple Cider Vinegar (organic with mother)
3 Garlic cloves
Onion slices

Stuck everything except the onion and salt in the jar before adding the cut cucumbers. Add Salt.
Top with filtered water and onion. I used the onion to keep the cucumbers submerged in the brine. Put the lid on and shake it up.
Finished!
I left these in the sink to ferment 4 days before I put them in the fridge. The water did get cloudy and bubbles appeared at the top while they fermented.
Before putting them in the refrigerator, I did taste them to make sure they were done and to my liking. I actually let them sit out another day before cooling them.

They are super tasty! and crunchy and I think that the onions even taste good. I am really amazed at how easy and fast this is to make. Why didn't I try this sooner?!

Have you tried fermenting anything lately?

Shared at: Blue Friday, Show and Tell,

Saturday, July 27, 2013

Fermenting Experiments

This summer has been fun in the experiment, idea, and travel departments. So many things to do! 

I have been enjoying the benefits of some food fermentation. My first thoughts when tracking down the recipes were, "This is easy!" With easy in mind, I wanted to tackle some of my favorites: Sauerkraut and Pickles! Let's discuss the Sauerkraut.
I love Sauerkraut. Yummm. And now after having the fresh stuff... I don't think I can ever go back to the store-bought squishy stuff.

What I used: 1 Giant cabbage. Sea Salt. Garlic. Huge Bowl. Mandolin. Knife. Mason Jars.
 I sliced the cabbage up in order to shred it with the Mandolin.
Every time I added a new layer to the huge shredded cabbage bowl, I sprinkled Salt over it. I might have used a total of 2 or 3 Tablespoons.
My little helper massaging the Salt into the cabbage.
 Once I finished slicing, I squished. You need to massage (squish) the salt into the cabbage. It doesn't take long to start feeling the wet brine all over your hands (hope you don't have any open cuts!). I squished for about 20 minutes for this entire mountain of cabbage until the pieces looked translucent.
It's wet!
I chopped up a couple garlic cloves at this point to give it a little spice and tossed it in with the cabbage. Then I started stuffing. I jammed as much Sauerkraut into each jar as I could and then pushed down so the brine covered all the cabbage. (In hindsight, I would have added a sliced onion or something on top to keep the kraut submerged.) Put the lid on and stuck the jars in a corner to ferment.

You can see the Brine a little in this picture. No water added, I promise.
Next time it would be a great idea to leave the jars in the sink to ferment since they actually bubbled over the top onto my counter leaving me with a bit of mess and smell to clean up 2 days later. I added filtered water to keep the Kraut submerged. The jars shouldn't be left in the sun, so it will have to be covered up. I tasted it after 3 days and put them in my refrigerator to slow down the fermenting process. Easy! (you might choose to leave it out longer, it is all to taste.) It would take longer if I chose to ferment all of it together too, but since they were portioned in jars, it was rather quick.

The result: Even though the cabbage started out green, after fermenting the Sauerkraut really is white. I am so glad I thought to add the garlic! It gave the Sauerkraut a bit of a bite. It has a really nice flavor and is still crunchy! So good. 

Sunday, April 14, 2013

Water Kefir Trials

I have been working on several projects recently. Don’t worry, I will be posting all my experiments… I have been creating decorations for a blog-worthy birthday bash, experimenting with sourdough, considering taking on Kombucha, and playing at flavoring some water kefir.

Water Kefir is a fermented drink full of beneficial bacteria. I have never been a fan of yogurt and the thought of popping probiotic pills rubs me wrong, but the process of making my own beverage with the probiotic benefits intrigues me.

So… Here I go!
I spent $12 for 1/4 cup of water Kefir grains, also known as SCOBY (symbiotic culture of bacteria and yeasts), on Amazon. They remind me of tapioca since they are a bit slimy.
When I got my grains, I added them to a mixture of organic sugar, molasses and water and let them sit for 2 days.
You can see the grains at the bottom eating up all the sugar.
I decided to do a second fermentation to let it become naturally carbonated. Sounds cool right?! I don’t like soda because of the ingredients and how it makes me feel when I am done drinking… so I am excited to see how it comes out! (I am jumping up and down in my seat. Just so you know.)

Batch one: I removed the grains and separated my completed Kefir into 2 containers. One contains blue berries and black berry with cranberry juice. The other has a slice of ginger and 2 tablespoons of Lemon juice.

After I let this batch ferment for the 2nd time, I had a bit of a dilemma. I was going to be out of town for 3 days. What do you do with your grains? I had read about exploding jars when you let it sit too long and I didn't want to come home to a mess. I also didn't want to kill off my new grains… I did read that if you give the grains sugar water and put it in the fridge it will be okay while you are away. Although this is a little contrary to the idea that the grains need to stay warm and at room temperature, I thought I would try it. Into the refrigerator it went with a ½ cup of sugar in a mason jar.

I was a little disappointed when I came home to discover that ½ of my grains were gone. I decided to compensate for the missing grains by adding extra sugar (1/2 cup instead of 1/3 cup) to the next batch and let it sit about 6 hours longer than I did previously. I think the adjustments paid off since many of my missing grains came back! (these grains multiply, by the way)
Just so you know the type of Molasses I used.
Also used a mixture of Turbinado and dehydrated Cane Juice
While Batch #2 is fermenting on my counter, I was able to try my finished water kefir! Yum. I have to admit that I was a little worried since the informational paper that came with the kefir grains said, “Sometimes after shipping, the grains are reluctant to ferment. You may need to repeat this process up to 3 times before they are fermenting heartily.” Luckily, I didn't have any problems and my water kefir turned out nice and bubbly.

I was pleasantly surprised with the taste. I liked the berry juice version better since the one with the lemon tasted a little more yeasty. The berry version tasted like a mild wine cooler. It was sweet, but not in a lip-pucker way, more in a cheap wine or grape juice sort of way. I liked it. My husband was a little confused with the taste – but he was a real skeptic to begin with. By the 3rd batch, I think it started growing on him.

I flavored Batch 2 in 4 jars (or I meant to…)
1.       Berries and Cranberry juice (like previous batch)
2.       Berries, ginger slice, fresh crushed mint and cranberry juice
3.       Lemon juice, berries, little bit of cranberry juice and Lime juice
4.       Lemon juice, Lime Juice, ginger and mint (going for a mojito flavor…)
I got a plastic strainer to filter out the grains.
Supposedly, medal will react with the grains. Can't have that!
See my grains.
Sadly, I misjudged the amount of Kefir so I ended up with flavors #1-3 and the inch and a half of juice in number four got dumped to fill up #2 and 3. So we will see what I end up with…

I drank up the first batch, while the 2nd fermented for the 2nd time. (still with me?) I really like the light headed feeling I get when taking a big swallow. This is probably due to the carbonation or maybe the yeast. I drank a little to aid digestion before eating. I even gave some to my kids when they asked for some “soda” aka sparkling juice, and they really didn't seem to mind. Score for Mom!
See the bubbles on top? And this is after Fermentation 1!
Batch #2 went in the refrigerator after a couple more days and Batch #3 got divided and I tried some different flavors. I made a point to write down what was in each flavoring batch so I can duplicate the ones I like.
Batch #3 flavors to try: (1) Berry juice with apple slices and raisins; and (2) Berry juice with raisins.
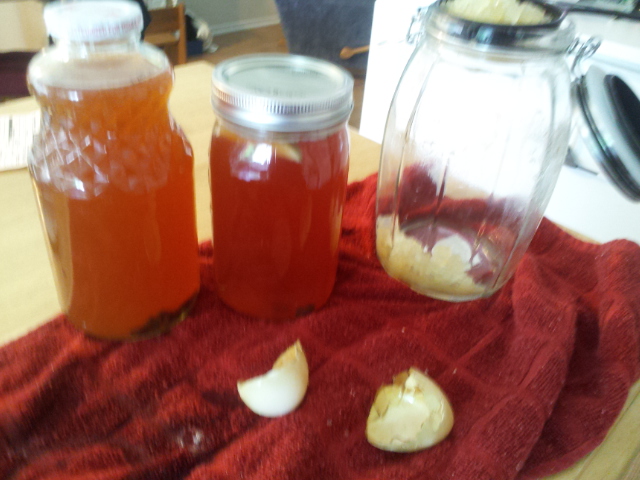
I added egg shells to this batch for extra mineral umph.
Interesting shape they are in after fermenting. Discolored and thinner than before
After Batch #2, Look at all the grains I have now!
They really DO multiply when they are happy.
From Batch #2, I really liked the refreshing flavor of the mint and lime combination with fruit juice and berries! Wish I had added lime juice to Batch 3. Oh well, there is always the next one!

Speaking of the next one. My grains doubled! I now have enough to divide into 2 batches. Nice!

I hope this wasn't too confusing. Generally, I was drinking the previous batch while a new one was fermenting... I am looking forward to trying out more flavors to find the right fit for my family's tastes. Here is a great page on flavoring at Delicious Obsessions that helped me.

Have you tried any home fermenting?
If you are visiting for the first time, join me on Facebook!

Shared at Saturday Show & Tell at Cheerios & Lattes, Anything Blue at Dedicated Housewife, I Should be Mopping the Floor Mop it Up, Old Fashioned Recipe Exchange, Frugal Days Sustainable Ways , Make it Pretty, Traditional Tuesday,

Sunday, March 3, 2013

BBQ Sauce: Easy & Yummy

It has been a while since I put up a recipe and since I was thinking last night about various things I needed to do, BBQ Sauce came up. I thought it was funny when my cousin yelled, "No Way! I can make BBQ Sauce?!" when I mentioned it. So rather than making the peanut butter that we really need (because it's a pain in the butt and I am a procrastinator at heart), I decided to replenish my empty BBQ sauce.

I have to say that I LOVE BBQ Sauce!

My husband teases me that I need a spout in my kitchen just for dolling out the BBQ sauce. That probably isn't a good thing. Especially when the labels look like this:


Notice that in both bottles of BBQ Sauce, High Fructose Corn Syrup is the first ingredient listed. They each contain similar ingredients. One thing I did not add to my sauce is Liquid Smoke flavor since I personally do not like the taste of smoked anything. It is amazing the varied ingredients that can go into this sauce. Every recipe is different - which is why experimenting is so FUN Necessary.

Luckily, the ingredients of the items I have in my kitchen to make this sauce Do Not contain the High Fructose Corn Syrup, soy or color. (Although I did discover an unopened container of mustard with some of the dreaded ingredients... darn the holidays! Hickory Farms is sneaky. I thought they were gourmet.)

I have only made BBQ sauce a couple times, and I haven't exactly made the same recipe twice because I keep tweaking it to see what the result is. I prefer a tasty spicy, sweet sauce. This time it came out a little on the spicier side. But it is good. My husband says that the homemade stuff smells and tastes like something that you get at a restaurant. That means: Mission Accomplished.

Now about the recipe that I put together. I have been changing it a little each time. It is the combination of a recipe from Rachel Ray, allrecipe.com, and food.com. Which means that it doesn't resemble any recipe, I just looked at the ingredients that other people have used and stuck the ingredients that I wanted to use into one recipe. I don't think that this is the absolutely best recipe it can be, but it doesn't suck.

BBQ Sauce

·         2 Cups organic Ketchup
·         2 tablespoons Dijon mustard
·         2 tablespoons Maple syrup (Can cut syrup and add more honey)
·         ¼ Cup Molasses 
·         ½ Cup Apple Cider Vinegar
·         ¼ Cup Worcestershire Sauce
·         ¼ Cup Honey
·         1 shot of Bourbon (I didn't have bourbon on hand this go round. I used 1shot/2T of Cognac instead. Which is just another alcohol that we don't drink.)
·         1 tablespoons Garlic powder
·         Juice of 1/2 large Orange or Lemon (I used an orange)
·         2 tablespoons Chili powder (My homemade version)
·         1 tablespoons Onion powder
·         1 teaspoon Pepper
·         dash of Salt
·          2 tablespoons Tamarind Paste (I did not have this. But supposedly it is really worth adding! I have it on my next Amazon order list.)

1) Mix thoroughly 
2) Simmer over medium heat for 15 minutes with the lid off to thicken it a bit.
3) Taste and adjust. It may taste a bit vinegary at first, but that is less obvious when you use it. You can store it into clean bottles in the refrigerator for a month or two.

This recipe made two bottles of sauce.

Enjoy!
I would love to hear any suggestions how you make BBQ Sauce. How did you tweak the recipe?

Shared at: Cheerios & Lattes, Mop it up, Make it Pretty, Shine on Friday,

Monday, November 12, 2012

Tis the season for Punpkins


This is a first for me.  I never really thought about making my own pumpkin puree until I saw the cute, little pie pumpkins at Trader Joe's. I ended up getting a few more pumpkins from Freecycle (yea!) and so made a giant batch of 7 pie pumpkins. Ambitious… I realized this about half way through the process.

Even though this is my first pumpkin cooking journey, I figured it was worth writing about and I have no idea when I will do this again. 


Before I heated the oven I did my research. There are a few ways to get the good stuff. You can cut it up and stick it in the oven. You can chop it up and toss it into a slow cooker. Or you can do what I did… simply deposit the pumpkins into the oven.
Before
After
The simple way, or so it seemed. I coated the pumpkins with coconut oil and put them in there at 400 degrees. It took a little over an hour but then they cut like butter and the seeds just fell out with only a little scraping.

I set up with the cutting board area. A little bowl for the seeds (planning on roasting them later) and a huge bowl for the flesh of the pumpkins. Separating the seeds from the hot stringy goop was the part that took a long time and made quite a mess. Every time I had to stop I had to scrub my whole arms.

I noticed that the smaller the pumpkin, the more seeds and water there was.

When I was done cutting up the pumpkins I looked online again. I noticed that each website I came across used either a blender or a food processor to puree the stuff. What a mess! I decided to use my immersion blender. Much easier I think.

Looking at the puree, I decided that I needed to strain the orange puree. I know you can use a paper towel, but I just happen to have had some new cheesecloth. I rigged up a bowl with a large colander (I rarely use this but it sure comes in handy to have!) containing the cheesecloth. Once I had the pumpkin inside, I covered it with foil and stuck it in the refrigerator overnight.
In the Fridge on top of my batch of Granola Bars

Please note that I started this process at 3pm Sunday with a brief pause for dinner and putting kids in the shower and bed, I finally stuck the puree in the refrigerator at 8pm.

I picked this up again the next day. 

I took the juice and saved it in a jar. I ended up using some of it in place of water in a batch of pancakes. No need to let the nutrition go to waste...
Check out all this juice!


I started portioning out the pumpkin for freezing. I find it very interesting that pumpkin cannot be home canned...

Plus extra for pie!
Double bagged for the freezer.
 My husband saw what I was doing and asked for pumpkin pie… so I ended up with 6 portions to freeze and 2 pumpkin pies (that were really good! And surprisingly easy to make).

One pie did not last long. I mixed a couple recipes that I found on allrecipes with one I found from Paula Dean. It is a really good thing I made the other one to freeze for latter!

Have you ever experimented with pumpkins?

Shared with DIY Home, Monday Mania, Recipe Exchange, Frugally Sustainable, Should be MoppingCheerios and Lattes and Mostly Homemade.

Sunday, September 30, 2012

Road to Shampoo-less-ness

I have been trying to remove the chemicals from my house for the last year. The next step is Shampoo and conditioning products. I have been scouring the Internet for shampoo replacement ideas (an ongoing process). I started making my husband’s “shampoo” about six months ago with oil, water, tea tree oil and castile soap. It works great on his hair, but didn't really cut it on my thick, long and curly locks. I used the same mixture for about 10 days before I gave up on it. I understand that there is a hair detox period, but my hair just got dryer and dryer.

I dreaded the idea of using baking soda.

I started entertaining the idea of a shampoo bar, like the one on Frugally Sustainable. I am not quite ready to make it, though. Then, I found a soap that just might be what I was looking for. I thought I would give it a chance.

African Black Soap is made with coconut oil and/or palm oil, Shea butter, oats, aloe leaf juice, plantain extract, vitamin E, vegetable glycerin, and essential oils. It has a reputation for fighting acne, detoxifying and healing skin conditions. I also read that it works miracles on curly hair… let’s see!

Although I was going to buy a bar from Butters-N-Bars.com, but decided to order the Nubian-Heritage bar from Vitacost since I was making an order anyway. I even read all the reviews; most of them mentioned how soft their skin was and a couple did say that they used it on their hair. I’ll take that as a good sign.

I decided that taking out shampoo chemicals should coincide with taking out conditioner too. I took a small spray bottle and filled it with ½ Apple Cider Vinegar and a couple drops of lavender oil. After washing I sprayed my hair with the ACV and left it in while I dried before I wrapped my hair in the towel and let it sit a little longer before combing it out.

My log:

Wash #1 – So glad the vinegar smell goes away fast. My hair feels dry but combed out easily enough.
My skin feels awesomely soft from the lather!
Day 2: The next day the hair in the back of my head, close to my scalp was really oily.

Wash #2 – Soap seemed to lather more in my hair than before. Still felt dry when I combed it.
Day 3: The next day I could tell there was some improvement. It wasn't as oily, but still feels a little thick and sticky.
Day 4: (usually wash my hair every other day) I woke up with a head of nappy hair. There is no other word for it. It was nasty and sticky dread-lock like; though it didn't look bad when brushed out. And was not frizzy either, like it normally would be if I brushed my hair when dry.

Wash #3 — I was thinking that the stickiness of my hair could be because I have not been rinsing the vinegar out. So this time I let it sit, combed through it with a wide-tooth comb and then rinsed before getting out of the shower. It seems less sticky. We shall see.
Day 5: Every day seems to get a little easier. My hair is still stiff/sticky (which really is a bummer!). BUT the hair by my scalp is soft and easier to run my fingers through. So that makes me think that I need to stick it out until my hair grows out.

Day 6: Wash #4 – This time I used barely any vinegar and caved in a little by using some stay-in conditioner spray. I don’t really think it helped though. I might go back to the chemically-rick Suave if my hair doesn't improve soon!
Day 7: Blah.

Wash #5 – I think and hope that my hair is getting better. I would hate to quit and go back to Suave.
Day 8: I went through the whole day with my hair up again.

Wash #6 – My hair felt a little oily at the roots. Funny how light and normal my hair feels when it’s wet…

Day 9: Wash #7 – I know I shouldn't wash my hair 2 days in a row. But I have a meeting tomorrow and I can’t look like this! So I decided to switch it up (couldn't look worse than it does…) I used Baking Soda mixed with water in a squirt bottle first. Then added a little bit of the African Black Soap before rinsing.  This made my hair dry! But the ACV made it easy to comb through. Wow! I can feel a difference, but since it was still a little dry so I put a little coconut oil on my fingers to comb through my hair when I got out of the shower.
Day 10: I might just stick to last night’s routine! My hair feels much better today and looks better too. Not perfect, mind, but getting there and I feel encouraged.

Day 11: Wash #8 – I did the same thing, minus the coconut oil. Next time I buy the Black Soap, I will buy the kind without the oatmeal, which feels great on my skin but my hair tends to stick to it.
Wet hair. It does dry much faster!
Day 12: My hair is less dreadlock-thick feeling. Still a little sticky but getting better

Day 13: Wash #9 – After letting my hair down it feels dry on the end and oily by my head before I washed. Same wash as #8.
Day 14: At least my hair looks a little better than it did a week ago. But I am still unsatisfied. I hope this continues to get better or I might have to start testing more methods. Blah.
Day 15: I woke up looking like I was balancing a nest on my head. This seems to be the norm lately. I had to comb my hair which made it look like a frizz ball (typically I can only comb it when it is wet so the curls stay intact). Luckily it looks great when it is up and hidden from site.

Wash #10  - Baking Soda. Soap. Vinegar.

I am going to stop there and post an update again in a month or so since I don’t have much else to report in the encouraging department. I am just hoping that this whole icky hair business goes away and I get my silky feeling back (without resorting back to the chemical stuff). We shall see.


Any words of encouragement from people out there who have taken shampoo out of their routine?

Shared at Tip Tuesday, Cheerios and Lattes and Frugally Sustainable.

Wednesday, September 5, 2012

Making Disinfecting Wipes

I finally used up all of my Clorox and WannaBe-Clorox wipes. I love these things! But I have been waiting to go through my supply so I could implement a greener wiping method in my house. There are two reasons for making my own wipes: (1) to make my house a less wasteful place and (2) because I hate spending money on items that are meant to be thrown away. Are you with me on this one?

I have seen other's replace their wipes with a soap solution and paper towels. But, instead of wasting the paper, I have decided that instead I am going to cut up some fabric from old T-shirts. I have to do the laundry anyway... I decided to keep the solution simple rather than use a bunch of essential oils:

2 tbsp. Liquid Castile Soap
1 ½ cups Hot Water
½ cup Vinegar

I had some lemon-marinated vinegar on hand, so that’s what I used to get a light citrus smell.

But I regress…
First I cut up the fabric into rectangles.
I folded to stagger the rectangles.
(It will pull the next rectangle up the hole of the container like store-bought wipes. And it works! Which makes the minutes it took to fold these worth it.)
Stick the wipes in the container.
Mix the solution and pour it into the container.

So I have used them and they work just fine. Even better, they smell like soap. I added a bag under my sink for the used wipes. When it's full, I will wash them.

Shared at Frugally Sustainable, One Creative WeekendCheerios & LattesMake it Pretty, Tip TuesdaysPositively Splendid and Living Green.

Featured on One Creative Weekend