background & pinterest, facebook script

Showing posts with label Organization. Show all posts

Sunday, February 17, 2013

New Years Resolution to Vacation

A couple years ago, my husband and I realized that the vacations we want to go on NEVER happened because we didn't plan for them. This would not do! I know that memories are made every day, but have you ever noticed that the memories you cherish the most are the special times you did something unique? Especially for kids. So we made a resolution to plan our year for each New Year. This has worked out really well since we started three years ago.

It is really very simple. On New Year’s Day we investigate costs associated for the trips we want to take that year and then we put it on our calendar. By knowing when and how much things costs, we are able to come up with a budget and a savings plan so we have the funds to go. It is also helpful to know your plans so that you can keep a lookout for any deals.

Our first year, we were able to save for a one week Anniversary cruise for my husband and I to Mexico. This was our first time away from them so just juggling where they would be was an experience. We also made a three day trip to Disneyland around my daughter's birthday and a couple camping trips with the kids. 

Last year, we went camping a couple times. We went to Tahoe to ski for a week and a day at Disneyland. We also planned for a trip to Colorado and Arizona, but the trip to Colorado for Thanksgiving was canceled since Colorado family members there were all sick with the flu. We did make it to AZ to visit my husband's family and see his grandmother for her 95th birthday.
 This year, we are really excited to make it to Colorado this summer. My husband and I went to Tahoe without the kids for 3 days for business and fun time together. We are also planning a train ride to San Diego to take the kids to see the sites and visit Sea World. We were also considering a trip to Hawaii without the kids, but have decided that we need to hit our business goals. (Besides, we hit our goals and the company will send my whole family for free next year.)

Next year we would like to go to Australia!

How about you? Do you make the resolution to vacation?

Shared at: Mop it Up, and Cheerios & Lattes

Tuesday, November 13, 2012

Holiday Preparedness 2012

I am very close to being completely done with Chanukah/Christmas shopping. Hallelujah!

I have yet to really go through what I think I have and what I bought that I don't remember buying. It is all under my my bed, stuffed into the closet and there are even a couple things in the garage. I started buying a few things here and there back in March, but I have been filling in the major gifts in the last two months bargain shopping. There are a couple things that I do need to buy last minute, like new pillows (how do you hide those?!) and I also have some items to make on my to-do list.

Luckily I do know what I need/want to make and buy thanks to my handy spreadsheet.

To keep myself accountable, I thought I would share my homemade gift to-do list.

For my daughter:
- Play apron and potholders. I have already started cutting the fabric for these and I am really excited for her to play with her own potholders rather than mine. It is very inconvenient to have to search them down to take something out of the oven...
- Mirror. I have this really cute iron mirror that I got on freecycle that I can just envision as a fuschia pink in her room. I have not been able to find the right color spray paint, so I am on a mission to find the color at the craft store this week.
- Bed Skirt. This is the same bed skirt I set out to make in May for her bed and still have not started. I would like to finish this to give as a gift, but I will be happy if I finish by valentines day.

For my son:
- Game Bag. He is really into games right now. Any card game or board game is, um, game. I found a great idea at Teach my Child. Where the outside of a bag is a tic-tac-toe board and the inside holds the pieces. I am taking that concept and using a pillowcase to save time and making a game board on both sides: tic-tac-toe and checkers! I got all my pieces and I have to do some spray painting and sewing, but this should be a quick project once I have the time and energy to finish it.

Other gifts: (not started yet... lots to do!)
Teachers: I plan on giving a book (for the class) with a chocolate dipped candy spoon for her.

Aunties: There is a really cool versatile shirt called the Bina that I found online that I want. So I thought I would make one for my sisters (and myself). Much less than to spend $50 each...

Family from Kids: Key-chains from clay. Stamped and painted. I also want them to make me a couple charms for a personal necklace for myself. This should be a fun project to do with them!

Neighbors and Friends: I will make a batch of my mocha cappuccino mix to put in a pretty container with marshmallows tied with a bag of popcorn and chocolate dipped spoons for a cozy movie night. Much easier than making a fresh batch of cinnamon bread and apple butter like I did last year...

As you can tell from my list, I have a bit of an ADD problem starting a million projects at once (and this is ONLY holiday related!).
What homemade gifts are you making this season?

Friday, November 2, 2012

Transition to Working Mom

I think the title of this post is funny since I consider that being a Mom a lot of work. Simple errands are an adventure! But since my two year old started preschool, I have been thinking that I would like to occupy my time doing something other than mopping the floors. Before having my son I took the CBEST thinking that I would like to teach. I was sooo fortunate to get a job at the school district as a substitute teacher. This has been great! I am able to have a very similar schedule as my kids and easily take off days that something is going on. I took a day off when my little man was up all night sick; and another to take my daughter on a field trip.

I like the flexibility. But I have to say that on the nights I work I am exhausted! I come home and sit. I just don’t have the energy to get up or cook or clean up. My husband has been amazing picking up and dropping off kids and even cooking. So here are the differences… I used to get the kids up dressed and ready in the morning, make lunches, breakfast and then schlepp the kids to school before running around before picking them up. Now, when I am working I still have to get lunches ready (including mine) and get kids up and dressed, but hubby is making breakfast, taking kids to school and even making dinner.

One thing I knew that needed to change is the way I have my meal plans drawn out. Otherwise I could see us wanting to eat out every night… 
Refrigerator Before...
and yes, that is a New Year card from last year
So I bought a cheap frame and glued some magnates on the back.


Made a cute Menu print out and printed on stationary. 


And voilĂ , a visible menu easy for daddy to follow and mommy to plan for.
MUCH Better!
It still isn't as clean as some refrigerator doors that I've seen on Pinterest. But we have to do what works for us. Before I wrote in my own book and kept track of meal plans, but that just wasn't working out with the change in duties. I really like this change and think that once the kids are reading, there might be less complaining over their dinner since it was posted for them to see. It has made a huge difference in our planning!

What do you do?

Shared at Cheerios and Lattes, Saturday Seven and Frugally Sustainable.

Saturday, October 13, 2012

My Holiday Present List

I know that Halloween has not even gone by yet and we are already seeing holiday merchandising in the stores. I have started seeing blog posts by other people about Christmas and Chanukah shopping. I have a couple of ideas for this year and I have purchased several things already.

I haven’t posted anything recently, so I thought that I would show you how I keep track of what gifts get given. I have an excel file that I have used for several years. Each year is on a different page. This allows me to look back and see what I gave family and friends the year before, and before that—eliminating the possibility of gifting the same thing twice.

My kids are super lucky since they get the best of all the holidays!


On the left side I have a list of all the people in my life. Family members and their children, friends and neighbors, work acquaintances, etc. are listed on the left side. And then I have boxes on the left of the sheet I have a couple boxes: (1) things still to buy and where, (2) major Christmas gifts, and (3) Chanukah gifts for each night.


I have already started this year’s – but I wouldn't want to give anyone the opportunity to cheat!

Shared at Cheerios & Lattes, Tip Tuesday and Petite Hermine.

Saturday, August 25, 2012

Space Birthday Party

I had a space-themed water-play park birthday party for my now 5 year old boy. It was great! 

From the cake, decor, food and water activities, I tried to stay with the theme and a budget. In the end, the kids had a great time!

Connor requested a water party and I have to admit that mid-August is the perfect time to have a water party! This party would have been a lot easier in a backyard, but since my mom's yard is grass-less at the moment and I don't have one, the park is the place. I sent out an evite. I have discovered how awesome evite is since it collects RSVPs and reminder emails. Technology is wonderful. On to the lists. 

I have Lots of lists when I plan a party. Lists of ideas and internet links to pictures and anything new that pops into my brain while putting it together. 

This picture was taken before
everything was done
Decorations:
  •  Cut out stars from poster boards. String together groups of 3 and 4 to hang from the streamers.
  • Streamers (green and blue). In the end, we used a lot less hanging decorations because of the wind.
  • Use green balloons to make alien heads by drawing faces on them.
  • Streamers (green and blue) 
  •  Happy birthday sign for the cake table
  • On the tables I had space stickers, little space shuttles for the kids to toss around and alien masks for the kids and cut out confetti for stars. I didn't end up putting out the confetti because of the wind.


Food:

-      Space Debris (green colored candy popcorn)
I used the recipe I found here, but used blue food coloring to get a darker green color once it was mixed with butter. I also didn't need to use very much. My kids had a blast making and eating the popcorn the night before too!
-      Grape and pineapple spears
-      Carrots and broccoli with onion dip
-      Pizza Planet pizza
-   Star and Moon sandwiches (peanut butter and jelly)
-   Cake! This turned out great. It is my first two layer cake. Cupcakes are compliments of my cousin (she has helped me with another party before; we make a great team), she had the frosting and eyeballs left over from her son's toy story party. They go great together!
Space cake with ailiens
Kid Activities:

-      Tie die T-shirt. This was also a favor to take home. They turned out to be out-of-this-world! I have some pictures below
Kids like cleaning when it's not the parent's idea.
-      Water balloons
-      Flying Saucer Toss. I found these neat Frisbees at the dollar store that look life flying saucers. I bought a wooden stake at Home Depot for 30 cents and wrapped it in bright green tape for a kid friendly ring toss.
-      Water squirt bottles and sponge meteors for a great water fight. I bought 5 oz water bottles for each kid at the dollar store and filled them ahead of time. They were a big hit and the adults enjoyed the spritz too. The kids had a great time with the sponge meteors, and even decided to use them to clean the park bench... so thoughtful.
-      Tubs of water on a kid table for little kids filled with misc water toys.
-      Bubble bucket with cups and giant bubble wands. I also bought individual bubble containers for the kids who want to walk around with bubbles. The wind actually worked in favor for all the bubble blowers. These bubbles were great! And the solution is so easy to make I never want to buy pre-made bubbles again.
Kid tubs ended up on the ground. Always a hit!
Water Balloons are in the bucket.
The T-shirt favors I mentioned were great! The kids had a blast coloring with the millions (ok a little exaggeration) of Sharpies. I learned about this from a gal in the education department at Joann's Fabric Store. I cut out cardboard to stuff inside the shirts, saved metal hangers to hang up the finished product and attached masking tape to the top to write the name of the artist. I bought kid's small and extra small T-shirt sizes. The process was super simple:
1. Color the T-shirt
2. Drip rubbing alcohol on the ink
The ink will spread and look tie died. 
Later, put them in the dryer for a couple minutes to let the ink set. Or, you could use a blow dryer.


Birthday boy coloring with daddy.
TaDa! They turned out looking spacey!
 Since this party, my daughter has been singing Happy Birthday To You around the house and asking me for a birthday. I guess now that this party is over I need to start planning the next birthday party.

Shared at Cherios & Lattes, Six Sisters, Nap Time and Frugally Sustainable!


Friday, July 20, 2012

CPP - Part 2

Always be prepared… Last week I prepared for our three day camping trip in the Camping Preparedness Program post. Here is what I did with that advice.

The Meal Plan:
Dinner 1:              Hot Dogs, Apple Sauce, coleslaw
                            Smores for desert

Breakfast:             Eggs, sausage
Lunch:                  PB and J or Egg salad sandwiches, fruit, chips
Dinner 2:              Hamburgers, Beans, Corn

Breakfast:           Bagels, fruit

Lunch:                BLT sandwiches, carrot sticks, and leftovers

Snacks:                
The Chef
Chips, salsa, bean dip, cottage cheese, pretzels, grapes, apples, granola bars, cheese sticks, graham crackers, popcorn

When I put together the meal plan, I went shopping in my pantry first and decided what I needed from there. Which was basically—hamburger buns, begals, fruit and smore fixin’s.

I wanted to bring just the right amount of food, but it’s better to have too much rather than not enough. We also invited some friends with kids to join us for a day or night, so I wanted to have enough snacks in case we had company.

What I made ahead:
-         Stuck fresh gapes, hot dogs, and hamburger patties in the freezer. They should be thawed in time to use them.
-          Hard boiled eggs and made egg salad
-          PB & J sandwiches
-          Lightly cook bacon
-          Make Coleslaw
-          Cut up carrot sticks

We are staying at a campsite that does not allow wood fires, so I packed some charcoal and durmaflame logs to cook our food and enjoy. It is a hot summer, so we would only have a fire at night.

Cooking/Dish washing station.
This camp did have a place to wash dishes by the bathroom, but I like my set up better.
Boil water and add it to tubs of water then put soap in 1 tub. 
For the kids I made sure to have bicycles and sand toys. I also bought them new flashlights (they love these things!) and light sticks to play with at night.

Because we weren’t going far or staying a long time our campsite was very simple. The more people the more complex, but not much. With more campers you basically, you need more chairs, food, and tent space. Which translates to the same amount of preparation. Ever notice that a party takes just as much work for 10 people as it does for 20?

We opted not to put up a shade since there were some nice trees. And our family of four fit nicely in one tent. We might need another in the future, but this works great for now—I might even splurge on one of those 10 man 2 room tents when the kids are older.  
Tired kids enjoying the outdoors before dinner time.
Not a great picture, but you can see the tent in the background and their little table.
What do you do when camping?

Saturday, July 14, 2012

Camping Preparedness Program

We are going camping. (Way to state the obvious!) We have only gone camping one to two nights with the kids so far to try it out. They LOVE it! But luckily, my hubby and I are both seasoned campers and between the two of us had all the necessary gear before we were even married. I am guilt of being a long time Girl Scout and my hubby is an Eagle Scout. Since we don’t have a camper (on the wish list for the future) we set up a couple tents, a shade and a stove and call it a campsite.

This isn’t exactly a program. More like a checklist and my method of preparing for the great outdoors without pulling your hair out or missing essentials. There are several things you need regardless of whether you have kids or not, but I’ll list kid stuff separately. I began writing this just for myself because I didn’t want to forget anything. But I think other people could benefit from this too!

The thing about camping if you have never done it; there is dirt everywhere outside. Campsites are plotted parking spaces of dirt with a BBQ, fire pit and picnic table. Make sure you pick a site next to the bathroom; it will make the experience much nicer. Most bathroom houses also have showers.  Find out what the amenities are ahead of time. Basketball court? Swimming pool? So you can plan.

I am a list person. When preparing for any trip I use up several sheets of paper on lists. Maybe I should make a master to save me the trouble… 

I have a list for camping gear, clothing, shopping list for non-food items and food. First things first.  If you know about the trip there are a couple things you can do to prepare.

1.       Save your laundry lint. This stuff is great (and FREE!). My family of four creates a huge amount of laundry lint. When you take it with you camping, you can use it as a fire starter rather than kindling (or with it) to get your fire started quicker. I found it easy to create portions  by stuffing it in toilet paper rolls.
2.       Save stuff that will come in handy that you can toss before coming home. I save a couple empty gallons containers for dish water. Save soap pieces (you know the stubs left when you use a bar?); you can cut up an old pantyhose and stick the old soap in the foot for easy hand-washing—this can be tied to a gallon jug of water.
3.       Take inventory. What do you have? What do you think you need as far as a “camping gear”? Kettle? Sleeping Bag? Tent? Rope? Old pans? Outdoor chairs? Shade or big beach umbrella?  Also, if you want to use paper plates make sure you have them. You will want to either eat off of metal, paper or plastic (metal and plastic need to be washed). This is a good time to start a grocery list.
4.       Meal Plan. Think easy to make on a fire (kids love holding a hot dog on a stick), things you can make ahead of time (like coleslaw, salsa & chex mix), and things don’t require a lot of time. I don’t usually buy individual servings of apple sauce or juice boxes but they come in handy here. Take another inventory of what you have and then another grocery list of what you need. I separate my lists into stores Walmart, Trader Joes, Costco and Farmer’s Market.

On to the Lists.

Basic necessities to bring:
Toilet paper (not fun when they run out)
Bug spray
Dish soap
Food and Water (bathing suit if you are going to be by a lake/stream/ocean)
Sunscreen
Lighter
Charcoal and/or firewood
First aid kit
Towels
Cards or other games

Camping Gear:
Tent, tarp and mat (set the tarp under the tent and the mat for the ground outside of the tent to catch dirty shoes)
Shade - if necessary
Kitchen items—Propane stove, kettle, pan, utensils, ziplock bags, foil
Fire sticks (really long wire hangers to cook hot dogs or marshmallows)
2 tubs (for washing dishes—one for washing, one for rinsing)
Clothesline for towels—use towels to dry hands and dishes also if you are taking showers or swimming
Table cloth 
Folding table - it helps to have one table for eating and one for food & dishes
Sleeping bags & pillows
Gas or solar lanterns and flashlights

For the kids (and you):
Clothes
Extra clothes
Sweatshirt (not a nice jacket. The smoke from the fire gets makes everything smell)
Diaper wipes (great for dirty hands before snacks and dirty feet before bed)
Outdoor toys (trucks, sand toys)

Food:
Snacks
Meals
Condiments
Water and other drinks

This post can also be found at Cheerios and Lattes, frugally Sustainable , One Creative Mommy and tatertotsandjello . 

Wednesday, May 23, 2012

Life Cycle of Kid's Clothing


The clothing in my house goes through a lot of stages and I couldn’t help thinking about the life cycle of my kids clothing while I was doing laundry. and more laundry... and more... you get the idea.

I have some friends who pass down their clothes from sibling to sibling and others who buy new clothes and the give it away when their kids grow out of it. I consider this to be the normal life of kid’s clothes. In my effort to recycle and be cheap thrifty frugal I have come up with a system for kids clothes that seems to work for us.

  1. “New” – I think half of my kids clothing is new and the other half are hand-me-downs (love them!)
  2. Wear, wear, wear – hopefully they don’t get paint stains prematurely… Some days the kids change clothes more than once and that makes for a lot of laundry. Any pants that were only warn a couple hours while not doing heavy playing or messy eating gets warn the next day since I consider those clean.
  3. Next there are a couple of choose-your-own-adventure variables
                Stained – If I cannot get a stain out, these get demoted to pajama/play clothes status
                Destroyed – Bummer! Holes and too much wear & tare from laundry with cheap fabric make for either retirement, recycle or pajama status. (My kids wear a lot of shirts and sweats to sleep in.  It’s not like anyone sees their night clothing other than family!)
                Too small – If they last to this point that’s great then there are other options for them.


     4.   Pajama or play (you know… the messy kind with paint and mud) – any closes that make it in the stained or destroyed category above gets demoted to this category.
     5.  Kids grow fast! What happens when clothes are out grown:

Retirement – make its way out of the closet and into the recycle or trash bag
Hand Down – I save a couple pieces of special clothing or ones that look like they are new. Boy stuff I hand down to my cousin, who gives it back when her boys grow out of it. Girl stuff I just save since I don’t have anyone to share it with. The idea is that I can help out my siblings when they have kids or you never know.
Recycle – Here is a pile of fabric I can use for silly projects and house rags.
            Re-purpose – This is a fun one if the option is available. If the top of a onsie fits but the bottom doesn’t snap (even with a onsie extender) you can cut the bottom half off, hem and then you have a pajama shirt. Or a pair of pants that fit their waist still but look like they are anticipating a flood, can be cut and made into shorts.
Sell – Anything that isn’t sentimental to save or too trashed to trash gets sold. It is really nice that there are resources like craigslist to do this. I take a picture of a bunch of stuff, put it in a giant box and call the lot $20. Or if I am able to have a yard sell, I try to sell things for $1 an item or bundled for a little less. This gives me a little more money to buy more clothes or shoes that I need to buy.

I think that about covers it. If there are any other ideas out there on how to stretch the clothing dollar for kid’s clothes, love to hear them!

If you like the content here, please like me on Facebook!

This was shared on Frugally Sustainable and Cheerios and Lattes!

Tuesday, April 17, 2012

Bursting my Tupperware Bubble

I was so sad the other day and I thought I would share with everyone in Cyberland. I was looking up cooking products that will not contaminate food and found some interesting information.

This is a picture of most of my tupperware containers.
Unfortunately not all the stuff fits in here...
and there are more storing food in the fridge and freezer.
(YES, it's a mess - my little one thinks it's her personal play place)
Nonstick Teflon isn't safe because they leak fluorine-containing toxic compounds. Not good. Any metal pans can leak metal into foods. For this reason, Iron (which is way too heavy for me and requires regular maintenance) is the best bet as far as metal since iron is not bad for you. Ceramic seems to be the best bet so I am looking into gradually changing out my ancient pans. Have you ever cooked with Ceramic cookware? They clean like a dream!

The problem with plastic and melamine is that they are not natural. When they are heated or cooled chemicals can get into the food. So I guess we are SOL?!

I have always thought that I was safe from BPA. I am aware of what I have and purchase and I was told that Tupperware (because it is more expensive and well known) was BPA-free. But just to be sure, I decided to write them a letter:
I am a long time user of tupperware. I have always thought that your products are BPA-free. But cannot find a place on your site that states that fact. Is this true and has is always been true? I have many older pieces (like 20 years) are those also safe? 
I would appreciate an answer. I love my microwave tupperware but would consider switching to all glass if they aren't safe to eat from. Thank you!
My reply made me feel... well, just read for yourself:
Dear Stephanie,

Thank you for contacting us and we appreciate the opportunity to address your concerns. Please be assured at Tupperware Brands we
’re firmly committed to the safety and well-being of our consultants and the many consumers of our products worldwide.

Polycarbonate is a high-strength plastic made from a monomer known as bisphenol-A (BPA). Certain Tupperware products are made from polycarbonate, including serving products and Rock 'N Serve
™/Vent 'N Serve™ storage and microwave reheating containers. However, currently in the United States and Canada we do NOT use polycarbonate in any children's products.
Of Tupperware's wide range of products around the world, less than 10 percent are made from polycarbonate. Tupperware's Research and Development group has found that polycarbonate creates the highest quality and most durable products for our consumers. Polycarbonate is used primarily in products intended for high heat resistance, as well as some serving lines. Consumers have consistently asked for durable, microwave-safe products, and we believe that polycarbonate has been a good choice for meeting this need.

However, consumers have also become concerned by questions that have arisen from the scientific community over the possible health effects from polycarbonate.

Currently we do NOT use polycarbonate in any children's products, and in March 2010, we began to use other materials for non-children's products that had been made from polycarbonate for sale in the U.S. and Canada.

We’ve posted a statement on www.tupperware.com which discuss our views on polycarbonate, as well as a Q&A which should help answer any questions you may have as to the safety of our products containing this material. We would also like to direct you to the following web site for some additional information:http://www.goodhousekeeping.com/food/products/plastic-safety-heat-food-6.
If you wish to know what materials are used to manufacture our products, please go to
www.tupperware.com. Click on Product Information, then go to Recycle Codes at the left hand side of the page.
If we can be of further assistance, please contact Tupperware Customer Care at 1-800-366-3800 between the hours of 8:30 AM ET to 9:00 PM your local time Monday through Friday. Any of the Customer Care Representatives will be happy to assist you.

Thank you, Stephanie, for your email.

Sincerely,
Tupperware Customer Care

What I find interesting is that they don't use polycarbonate in children's products but they use it in all the heating and cooling containers that I use and serve my kids from. I looked at the GoodHousekeeping link and it is great that BPA wasn't present in any of the food heated in their containers... But how old were those containers? Were they well-used like my entire cabinet of stuff is? no they weren't. The test items went through 30 washes and uses... so they were about a month old. I don't know how realistic that is.


So the search is on for alternatives. I figure one of my next ongoing projects will be to sell some of my tupperware on ebay and replace it with glass, ceramic and mason jars. I think I will keep some of my newer items. I love my set of white Corningware with lids. Perhaps I will get some more pieces. I found some great bpa-free lids for mason jars on amazon that I will order and see how that works out for us. 


My bad mood over this is that plastic and microwave-ware is so darn convenient!

Thursday, January 12, 2012

Organization Etc.


I have been keeping my mind busy researching sewing projects (what do I want to do first?!), acquiring the necessary stuff for my soon-to-be garden, trying to find time to read a book I said I would read, researching beds since my daughter is going to need one soon (more on that later!), and getting distracted from all the things I want to do by Pinterest and my messy house. Phew!

Ok, so for my garden I bought the seeds and peat pots. I picked up some dirt that a neighbor on craigslist was trying to get rid of. Saturday I am taking the kids to the ranch where they can get good and dirty… and I can pick up some horse um stuff. I am really hopeful that I will be successful this time around and acquire some greenness on my thumb. I am so excited about having fresh vegetables from a garden! And I know my son would love to “help,” possibly might even grow a desire to eat vegis… well, that would be nice.

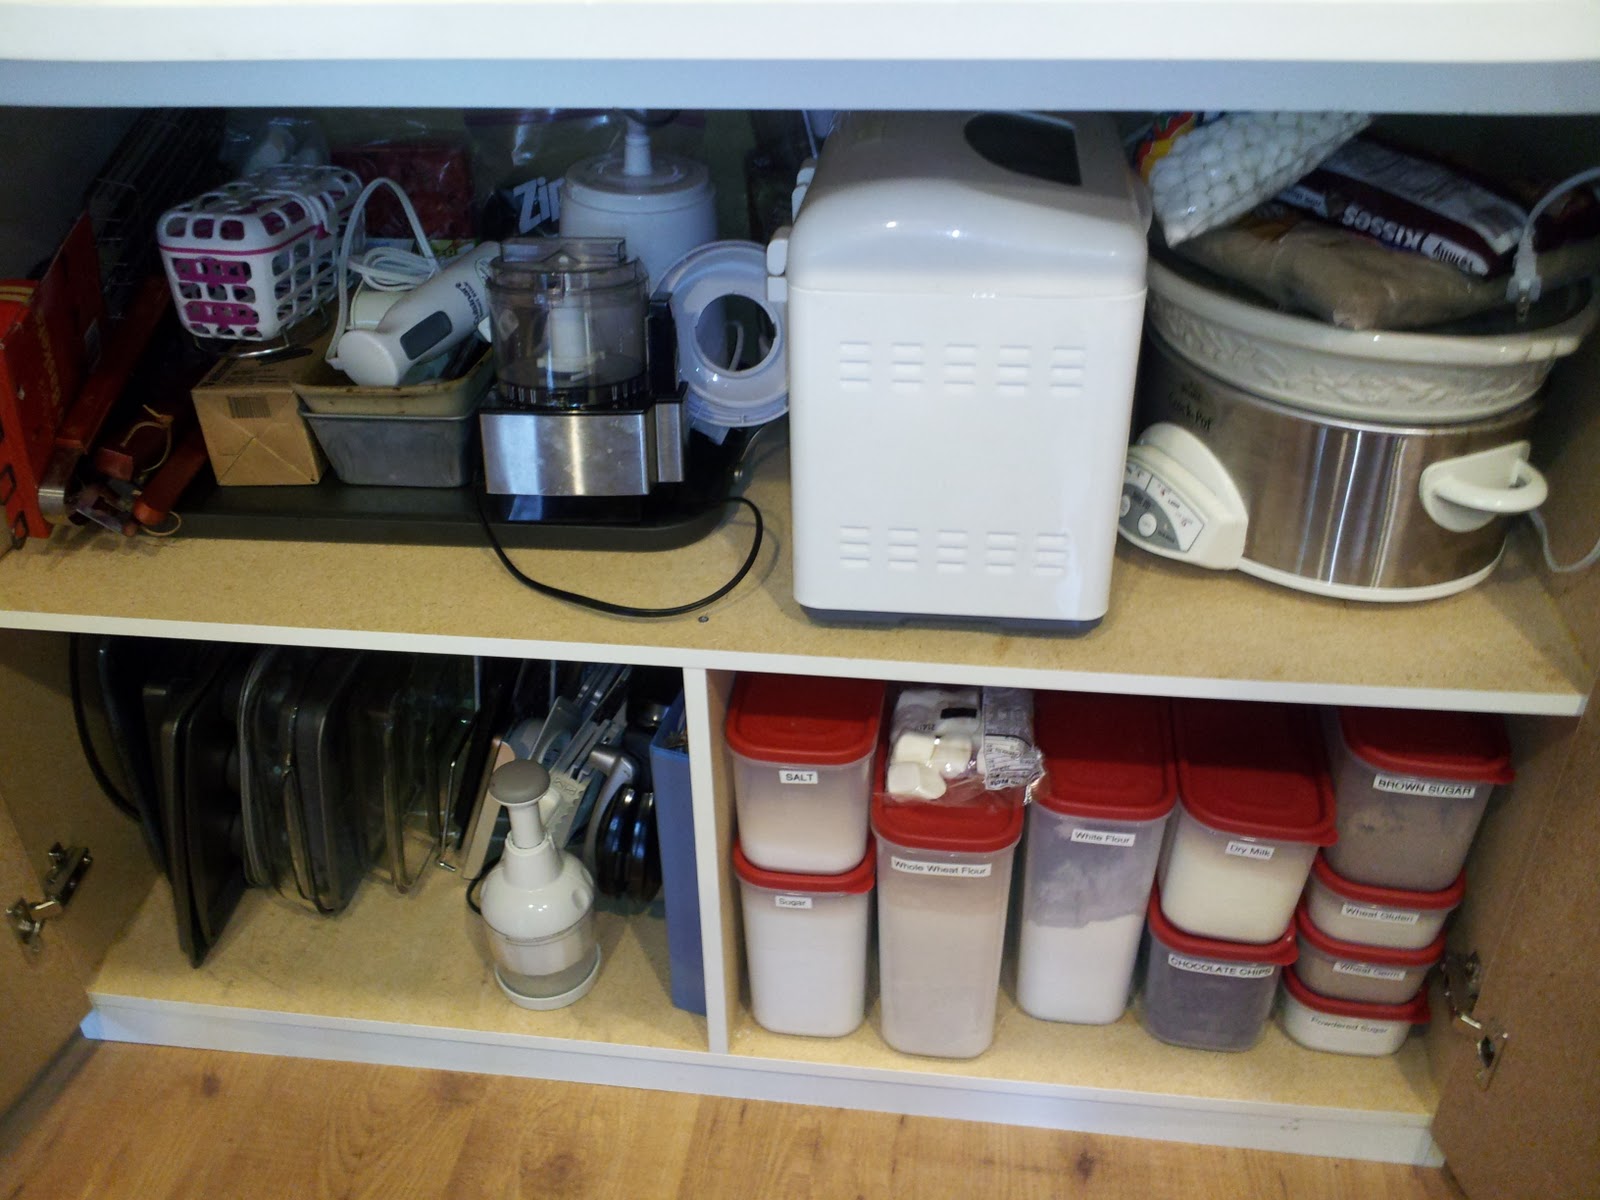
So as I was saying, I got in a strange mood yesterday and HAD to organize my “new” freezer and cabinet. My freezer is like a new toy. I wanted to get some bins to organize it a bit. Let’s call it prevention. I would hate for it to ever look like my little freezer did.  My cabinet is really a garage storage thing that I use in my kitchen to hold my microwave. It is great to have the space because I truthfully have nowhere to put anything that is housing in the cabinet and it conveniently works with a child lock so the kids don’t get hurt or into trouble.
 
For my baking goods, I have been collecting the Rubbermaid containers for a couple months and I like them more than the Tupperware I had. They take up a lot less space and are clear. So I have decided to sell the Tupperware set on craigslist, they are still sitting there for practically free compared to what they would cost to buy from a consultant. I bought a plate organizer for my cookie sheets – this is what really prompted an entire reorg session. I found the organize wrack for $3 and I couldn’t pass it up. The results were amazing! I didn’t take a before picture because you couldn’t really see anything anyway. 

Tuesday, October 25, 2011

Kitchen Organization Idea


While surfing the web the other day, I came across something called a Kitchen Folio on mamagenda.com. Great Idea! I have a corner by my microwave that is devoted to the catch alls that I need close at hand – but this little area can easily get out of hand! I love the idea of organizing these important papers and saving some money by using supplies that I already had and really making it personal to my needs. So... Here is what I did.

I took a project folder with pockets that I had in my stash of office supplies (this was probably left over from college or even high school or days.

The pockets will be perfect for take-out menus (we don’t use them often, but handy to have on hand), and random to-do’s that I get in the mail or maybe new recipes that I am trying that week.

I printed off pages that will help keep my life a little less crazy since everything will be in one place rather than scattered in my kitchen or office. But it was really important to me to keep it simple so it gets used.

Printed pages include:
·        Goals for month and year
·        Important phone numbers for quick reference & Babysitter use
·        Freezer Meal inventory (laminated)
·        Weekly menu plan (laminated)
·        Medical information
·        Running To Do list
·        Gym class schedule for a quick reference
·        Extra pages for projects, ideas & notes

I didn’t want to do anything too fancy, because this should be an evolving folder. As the family changes and grows – so does this. I used some fun stationary that I had in the closet. I sent my husband to work with the menu planner to have laminated, that way I can use a dry-erase marker and save paper. I thought about doing the same thing with the Freezer inventory.

You can also add other pages like important dates, calendar, gift ideas or grocery list. But this was not important for us. My husband and I have a synced google calendar and my grocery list is on my phone (I love it!) and it is synced with my husband’s phone, in case he goes to the store or needs to add to the list. For gifts I have a running spreadsheet so I have something to reference and plan, after all I don’t want to repeat presents from last year.

For me this project was 100% free. And I think that it is working out really well so far!


Thursday, September 22, 2011

Packing the kids

Me and the kids are hitting the road. I am looking forward to it, but I always dread packing, fearing that I will leave something out. After doing this a couple times, I think I have this down so I thought I would brainstorm and share. If you have any other ideas, let me know!

My biggest issue is organization. I mean, how do you organize a big bag you are planning to live out of? Little kids need so much stuff when we leave town that they have 2 LARGE bags to my 1 medium one (that includes my pillow). My biggest secret is: ziplock bags. I use a ton of them for the kids stuff. But I can use them over and over so it doesn’t seem like such a waste AND it makes life easier.
  • 1 ziplock for each day worth of clothes. This cuts down on over packing or not finding the matching whatever in the bottom of the bag.
  • 1 ziplock for each night worth of clothes.
  • 1 ziplock for toiletries. This is great so shampoo or lotion doesn't explode in the bag.
  • 1 ziplock of snacks. A must for my children. I only had one for an airplane flight, but I will end up bringing more than that this trip because we are driving so there is no limit.
  • 1 ziplock of baby feeding stuff. I won’t need much this trip since my daughter is now over the bottles, jars and formula. But I will need to bring sippy cups, forks and spoons.
Organized Chaos... 
I find disposable baby stuff is great on longer trips and at theme parks. I have only ever bought these things once since I don’t use them often. You can get disposable changing pads, bibs, placemats and washcloths. They don’t take up a lot of space. I also can’t forget the diapers and wipes (which Do take a lot of space.

Case of kid DVDs
1 bag of toys
Portable crib and baby blanket with sleeping animal
Also a couple of extra outfits is a good idea...

The first time I used this method was in August when Jeremy and I went to Mexico - our first time leaving the kids... for a whole week. In the past, when I just made a bag I would come back with my kids wearing the strangest combination of clothing and pajamas. The kids don't seem to care but... anyway, when I used my new ziplock packing with my kids clothing there was no question of what went together or if I packed enough. Mission Completion!