background & pinterest, facebook script

Sunday, April 22, 2012

A bed for my Sarah

Part 1
After a lot of searching and searching I finally have a bed for Sarah… sort of. Here is the story of what I ended up doing.

This took a lot of thought (that hurts).  I really was not interested in purchasing a new bed for $1000 that I loved that my toddler would destroy, as toddlers tend to do. I ended up getting the whole bed practically free. Rejoice!

The objective: girlly wood trundle bed

A bed a Costco that fit the bill was close to $1000. So not happening!  I didn’t spend a penny on my son’s bed – gotta love grandparents who don’t need a guest room anymore. I began looking online at craigslist and keeping a look out on freecycle in my area. Bingo!

Bed frame: Wood day bed from freecycle
Trundle: This was a little more complicated.

I found a person one mile away that had a metal daybed with a trundle and they wanted $30. A steal since just the trundle would have cost me $100 plus. So I jumped on it. Now I have an extra bed frame to sell.

Now it would have been really nice if the wood bed fame was in fantastic condition. But it needed to be refinished. It wasn’t bad, the stain was a little outdated and didn’t have a consistent color. I decided it would be a beautiful bed if it was white or fuchsia. I settled on white for two reasons. (1) I don’t plan on refinishing this ever again and (2) I already had paint, primer and supplies for white. So my refinishing costs is equal to my time, which isn’t cheap, but costs no extra money. 
Just call me Tom Sawyer...
I am currently working on the rest of the painting. I can take care of clumpy primer, but the actual painting needs to be even so the kids are out of the picture at this point. I will post a picture of the finished product. It looks 100 times better at this point than it did in the beginning! So exciting.

Oh! And I am also making a rag quilt and embellishing a bed skirt too for the bed. Not that I've started on the skirt yet, but it's on the to-do list!

Friday, April 20, 2012

Time for Corn Bread


A new day – a new Mix. 
Have I mentioned how much I LOVE my mixes?!

I went to make some cornbread to go with my slow cooker chili that was simmering. The perfect comfort food for a dreary day!

I thought I could save a little time in the future by having a simple mix put together.  I mixed it all up in a ziplock bag so I wouldn’t make a mess transferring it into a container. And it was really easy to mix it up too. Then I made the corn bread with this mix and it turned out fantastic. I’m thinking that I should try making corn dogs with this. I have never made them, but seeing all the coupons for corn dogs this week in the paper makes me wonder if I can make and freeze them myself....


Corn Bread Mix

4 cup unbleached flour
4 cup yellow cornmeal
cup  nonfat dry milk
1/2
 cup   baking powder
½  cup   wheat germ
1 Tbsp. baking soda
2 tsp. salt

Combine all ingredients in a bowl.  
Store in airtight container.

To make:

¾ cup honey (you can also just add ¾ cup of sugar to the mix but I always prefer a honey taste)
1 egg
1/2 cup water or milk
2 Tbsp. oil
1 1/4 cup cornbread mix
½ cup corn (I used frozen corn because I like real corn in my bread, but this is not necessary)

Preheat oven to 425 degrees. Combine ingredients.  Place batter in greased 8" x 8" pan and bake for 12-15 minutes, until golden brown. If you double the recipe for a larger pyrex pan it will take 20-25 minutes

TaDa!
Believe it or not, 4 adults and 2 little kids ate this entire bread!

Tuesday, April 17, 2012

Bursting my Tupperware Bubble

I was so sad the other day and I thought I would share with everyone in Cyberland. I was looking up cooking products that will not contaminate food and found some interesting information.

This is a picture of most of my tupperware containers.
Unfortunately not all the stuff fits in here...
and there are more storing food in the fridge and freezer.
(YES, it's a mess - my little one thinks it's her personal play place)
Nonstick Teflon isn't safe because they leak fluorine-containing toxic compounds. Not good. Any metal pans can leak metal into foods. For this reason, Iron (which is way too heavy for me and requires regular maintenance) is the best bet as far as metal since iron is not bad for you. Ceramic seems to be the best bet so I am looking into gradually changing out my ancient pans. Have you ever cooked with Ceramic cookware? They clean like a dream!

The problem with plastic and melamine is that they are not natural. When they are heated or cooled chemicals can get into the food. So I guess we are SOL?!

I have always thought that I was safe from BPA. I am aware of what I have and purchase and I was told that Tupperware (because it is more expensive and well known) was BPA-free. But just to be sure, I decided to write them a letter:
I am a long time user of tupperware. I have always thought that your products are BPA-free. But cannot find a place on your site that states that fact. Is this true and has is always been true? I have many older pieces (like 20 years) are those also safe? 
I would appreciate an answer. I love my microwave tupperware but would consider switching to all glass if they aren't safe to eat from. Thank you!
My reply made me feel... well, just read for yourself:
Dear Stephanie,

Thank you for contacting us and we appreciate the opportunity to address your concerns. Please be assured at Tupperware Brands we
re firmly committed to the safety and well-being of our consultants and the many consumers of our products worldwide.

Polycarbonate is a high-strength plastic made from a monomer known as bisphenol-A (BPA). Certain Tupperware products are made from polycarbonate, including serving products and Rock 'N Serve
/Vent 'N Serve storage and microwave reheating containers. However, currently in the United States and Canada we do NOT use polycarbonate in any children's products.
Of Tupperware's wide range of products around the world, less than 10 percent are made from polycarbonate. Tupperware's Research and Development group has found that polycarbonate creates the highest quality and most durable products for our consumers. Polycarbonate is used primarily in products intended for high heat resistance, as well as some serving lines. Consumers have consistently asked for durable, microwave-safe products, and we believe that polycarbonate has been a good choice for meeting this need.

However, consumers have also become concerned by questions that have arisen from the scientific community over the possible health effects from polycarbonate.

Currently we do NOT use polycarbonate in any children's products, and in March 2010, we began to use other materials for non-children's products that had been made from polycarbonate for sale in the U.S. and Canada.

Weve posted a statement on www.tupperware.com which discuss our views on polycarbonate, as well as a Q&A which should help answer any questions you may have as to the safety of our products containing this material. We would also like to direct you to the following web site for some additional information:http://www.goodhousekeeping.com/food/products/plastic-safety-heat-food-6.
If you wish to know what materials are used to manufacture our products, please go to
www.tupperware.com. Click on Product Information, then go to Recycle Codes at the left hand side of the page.
If we can be of further assistance, please contact Tupperware Customer Care at 1-800-366-3800 between the hours of 8:30 AM ET to 9:00 PM your local time Monday through Friday. Any of the Customer Care Representatives will be happy to assist you.

Thank you, Stephanie, for your email.

Sincerely,
Tupperware Customer Care

What I find interesting is that they don't use polycarbonate in children's products but they use it in all the heating and cooling containers that I use and serve my kids from. I looked at the GoodHousekeeping link and it is great that BPA wasn't present in any of the food heated in their containers... But how old were those containers? Were they well-used like my entire cabinet of stuff is? no they weren't. The test items went through 30 washes and uses... so they were about a month old. I don't know how realistic that is.


So the search is on for alternatives. I figure one of my next ongoing projects will be to sell some of my tupperware on ebay and replace it with glass, ceramic and mason jars. I think I will keep some of my newer items. I love my set of white Corningware with lids. Perhaps I will get some more pieces. I found some great bpa-free lids for mason jars on amazon that I will order and see how that works out for us. 


My bad mood over this is that plastic and microwave-ware is so darn convenient!

Sunday, April 1, 2012

Bread Epiphany


I had this amazing “Ah HA!” moment and had to share with the cyber universe.
 
I have a million things on my mind this morning since we are planning on driving to Tahoe tomorrow (last minute trip!) and so I am packing and menu planning and thinking of what I can do now to make life easier this week. One thing is make a couple loaves of bread so we don’t have to buy some – I have become rather spoiled with my yummy homemade bread.

So there I was in the kitchen with all my millions of ingredients making my wheat grain bread and then – Bam! I have been making all these mixes lately (Cappuccino MixMuffin Mix, Cornbread Mix, etc.) and I’ve been brainstorming on other mixes I can make to make life a little easier. BREAD MIX!


Bread doesn’t take that long so I don't find it a burden, but who wouldn’t love a couple extra minutes to do something else?

So I took my recipe that I already had all the ingredients out for and realized that by adding the dry ingredients in a bag. I would only need 3 ingredients when I next make bread, which will be right when I get back from my trip with the kids.

I put all the ingredients and measurements in a bag and labeled it with the ingredients that will need to be added to the breadmaker later. The ingredients to be added are: water, oil, and yeast (which I keep in the freezer). Easy right?!

In fact, I’m going to make a dinner roll mix to take with us for dinner one night. This idea has just changed my life!


* linked at The Frugal Days, Sustainable Ways Wednesday Blog Hop

Friday, March 30, 2012

Lemon Goodness and Flop


So here is an update on the Lemon Love post. There were two things I did with the lemons that needed time and so I wanted to write about what happened. One was a success and the other a Flop.

First I was planning to extract the oil from the peel:  Big Flop. I didn’t get very far. I thought I did everything right, but mold found my peels. Yuck! I was very sad about this but I wasn’t about to continue with the experiment and use contaminated oil. Oh well… maybe I will try this again with my oranges. I am waiting for an afternoon of no plans and no rain to be able to pick oranges and take care of that business.
 
One flop deserves a success! 


The next experiment was to make an enzyme cleaner with lemon and orange peels, brown sugar and water. Simple to put together and babysit. It was supposed to take 3 weeks and that time has come and gone. It was really interesting that I had to let the pressure out of the bottle sometimes more than once a day until the mixture decided it was ready. After the 3 week waiting period, the gas buildup was not really noticeable so could easily stay sealed.  But I must say that the air coming out of the container smelled nice and citrusy. Very pleasant!

The ultimate test: trying it out. I diluted the enzyme with water at a 1:1 ratio and put it to the test around my kitchen. I have to say that I almost expected to see little “enzymes” eating away at the grime, but it wasn’t nearly as dramatic. In fact it acted as any other cleaner does… only it smells much better! 

I actually tried it out in a couple of places. It felt like water when I was cleaning, although it worked better and on my flours it did the job and felt clean afterwards (I secretly thought my flours and countertops would have a sticky residue but not a bit of stickiness to be found.). Can’t wait to try it in other ways!

According to HappyHommaker88 , some wonderful uses for this non-toxic concoction are:
1)  do dishes and laundry (use 1/4 cup of enzyme)
2) for washing bathrooms and toilets. grime comes off easily (1 part enzyme to 10 parts water) 
3) for removing stubborn stains and odors (colored fabrics and floors) (use undiluted)
4) to clean vegetables and fruits (1 part enzyme to 10 parts water)
5) clear blockages in kitchen sinks and drains (use concentrated or blended pulp/sludge of enzyme)
6) as a natural insect repellent (use undiluted) for ants, cockroaches.. (pouring some enzyme into sink/bath/shower stall drainage holes will deter cockroaches).
7) as a floor wash to mop floors shiny clean (1 part enzyme to 20 parts water)
8 ) as fertilizer for vegetables, flowering and non-flowering plants (use 1 part enzyme to 20 parts water)
9) as a skincare product, e.g. facial cleanser or toner (1 part enzyme to 2 parts water)
10) wash cars – cars will look as if they have just been polished! (1 part enzyme to 20 parts water)

It is so nice to have multipurpose cleaners like this. Why buy all of those “1 thing” cleaners when you can have a bottle of vinegar and a bottle of this cleaner that does it all? I am really looking forward to making more batches and experimenting with this. Especially with Pineapple and other fruits to see what balance I like the most. I might as well capitalize on this season of lovely fruits and make enough for the rest of the year. 

Saturday, March 24, 2012

Muffin Bliss

I am so happy with my cappuccino mix, that I thought I would continue with this trend. I spent a couple hours searching for various mix ideas to try. Bring them on!

I have been making a lot of muffins lately partly because my son doesn't want to eat sweat breads (i.e. banana bread) as a snack, but he’ll eat a muffin… well, a chocolate muffin. I have hopes that he will expand his eating list, but for now I’ll add cocoa. I have posted a recipe for chocolate banana muffins before. Last night I made a similar muffin with the addition of peanut butter and oatmeal – SO good. I think this one is better than the last and I have reason to believe the kids feel the same since it was a hit for breakfast AND snack time. Anyway, while I was making the muffins I decided to also make a mix that will make muffin making much faster in the future.

The big benefit of the boxed ready-packed muffin mixes is that they take no time to make and only need a couple of wet ingredients. But there is a downside to the mixes and that is added ingredients meant to increase the shelf life of the mix while contributing to the obesity rate of the people consuming them (or is that a perk?). There can’t possibly be a good thing that comes from consuming ingredients that you can’t pronounce. So convenience is a good thing and saving money and time (which are synonymous) is a
great thing.

I found a basic recipe at TasteofHome.com but because I am me I have to change it. Which basically means that I take out ½ of the flour to substitute wheat flour and add wheat germ and flax seeds to give it that added nutrition without the family knowing (adding these extra ingredients is one of the reasons why it takes me so long to make stuff). My recipe:

   Muffin Mix

4 cups all-purpose/bread flour
4 cups wheat flour
3 cup sugar
1/3 cup baking powder
1 tablespoon salt
1/4 cup ground flax seed
1/4 cup Wheat Germ 

In a large bowl, combine the flour, sugar, baking powder and salt. Store in an airtight container for up to 6 months. Yield: 4 batches (10 cups).

Yes, this is a picture of the inside of my cabinet.
I LOVE these containers and my Brother Label Maker.
To Make Combine:
2 ½ Cups of Mix
¼ cup oil or butter
2 egg
1 cup milk
1 tsp Vanilla
¼ cup apple sauce (optional)
1/3 cup yogurt (optional)
1/4 tsp molasses (if you prefer brown sugar rather than white in a recipe)

Directions:

Preheat the oven to 350˚ F.  Line 18 muffin cups with paper liners or use shortening/oil so muffins don’t stick. Pour the dry ingredients into the bowl with the wet ingredients and mix until fully blended.  Bake 18-20 minutes, or until a toothpick inserted in the center comes out clean.  Allow to cool 5-10 minutes, and then transfer to a wire rack to cool completely before you cover them or transfer to a freezer ziplock bag to freeze. 

You can add any variation of ingredients to the mix to make it the kind of muffins you want. For example, to make the Chocolate Peanut Butter Banana Oatmeal Muffins I mentioned earlier all I had to do was add:
1 cup mashed banana (about 3 bananas)
6 tbsp. creamy peanut butter
¼ c baking cocoa
1 cup old-fashioned oats
A couple chocolate chips for the top of each muffin

Mix it up. Pop it in the oven. Gotta love it!

Wednesday, March 21, 2012

Dental Makeover - Part 2

Here is my log I kept to mark my dental progress and really just to see if it made any difference. And then my personal findings are at the end.

One of the things I mentioned in the first post is that diet has an effect on your teeth. I have been taking vitamins and supplements (when I remember to). I generally am a very healthy eater (hopefully this will rub off on my kids one day). But since I started cooking from scratch and doing more research (YEA internet!) I have changed several things. Besides the obvious benefits of cooking from scratch rather than eating processed foods, the big change has to do with the oil I am using. Coconut oil and Grape seed oil were foreign to me until fairly recently and now that is mostly what I cook with because they can withstand high temperatures. Maybe that makes a difference?
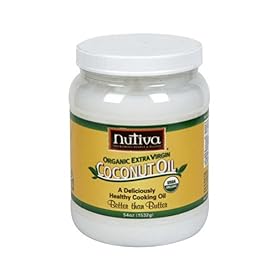
So now on to oil pulling. I battled with the question of whether to do it on a daily basis? Twice a day? Every other day? I really had no clue and it seems that it has to do with the general health a person is in. So I think I am safe if I skip a day but I am generally going to try to do this daily as I am getting ready to meet the day. I had to put a container of oil upstairs to remember. I planned to alternate weeks using olive oil and coconut oil. However, I found olive oil a bit nasty – I think the smell made me gag- so a little into it I decided to stick with the coconut oil. I keep a jar in my bathroom with a baby spoon to dish it out.

Day 1 – This is actually my second time. I tried it about a week ago. But now that I’ve written about it, I am committed! I used olive oil and besides having a rather active gag reflex whenever the oil made it to the back of my mouth, I was good. My kids found it rather amusing that I was miming to them to “get dressed” and “get going”.
What was very interesting to me was the amount of mucus I felt in the back of my throat for the next couple hours. Is this normal?

Day 2 – Surprisingly it was super easy and not as gross today. I accidently swallowed flem that came up – need to remember to spit it out. I didn’t make it the whole 20 minutes since I somehow managed to get air in my mouth. I had to get to the sink quick to spit the oil out. I had to change my shirt – don’t ask. But the stuff I spit out was of a milky consistency. My teeth are strangely sensitive.

Day 3 – I had a headache tonight.

Day 4 – I realized that my teeth have never felt this clean before All Day.

Day 5 – I woke up with a cold. Throat and headache… I didn’t oil pull this morning. But I don’t think this is going to turn into anything major, so I will be at it again tomorrow.

Day 6 – Back at it. I realized today that my teeth haven’t been sensitive for a day or so.

Day 7 – I used Coconut Oil this morning. I think the reason my gag reflex was working the last couple days had to do with the smell of the olive oil. No problems with the coconut. Love this oil! I might just stick to it the rest of the experiment. The only thing is the initial melting of the oil, which is odd. But I figured out that if you keep it at the front of your mouth it melts quickly and then you don’t have to chew it. 20 minutes went by quickly and my teeth still felt really clean throughout the day.

Day 9 – I looked in my mouth (duh!) and noticed that the gums around my teeth look healthy and not dark pink or red. That seems to be a positive.

I really didn’t keep up on the log for very long. Partly because I’m lazy and partly because every day was about the same. But I kept it up!
I find it strangely therapeutic at this point (day like 15). Partly because it is a quiet time for me; my kids can talk all they want but I can’t respond verbally. When I was a teenager, I would roll out of bed get ready and go to school and say as little as possible. I have never been a morning person… enter kids and then you have to be the driving force to get them dressed, fed and out the door. Mornings are forced on you. So this has actually given me 10-20 minutes of quiet time I have always needed to wake up. Bonus for me.

I am flossing right after oil pulling and I seem to get more on my floss in the morning than I do even in the evening. I have noticed that even at 4 in the afternoon, my teeth still feel clean—as clean as if I just went to the hygienist. I really like that!

The other thing I have noticed is that I regularly have mucus coming up to spit out (not normal for me) and on an even more gross (and personal) side my BM have actually been more regular which makes sense if this is technically a whole-body detox. I have always had issues with irregularity in that department unless I exercise on a very regular basis, but that certainly isn’t happening.

Day 26 - the Verdict:
Today I saw the hygienist (I am on a 4 month schedule) today. I didn’t get x-rays so I’m not sure about those cavities so I will have to see about that one in May. But the hygienist was amazed at my mouth – that sure sounds funny. She said that my gums are no longer bleeding. The gum pockets on the side of my teeth are not as deep or full of grime. I had hardly any plaque to remove. “What have you been doing? Flossing more?” ummm, no. So I told her about the oil pulling that I was trying; which she wrote down to research since she hadn’t heard of it before. In fact if my teeth look this good at my next appointment I get to go to a normal 6 month schedule. Woo hoo! Success.

I am so making my husband try this